
Set Up a Restricted Linux NFS Share
Network File System (NFS) lets Linux clients access a server-side directory over the network. This walkthrough starts with a read-only export limited to a private test subnet. Use your organization’s approved package, firewall, and identity-management procedures before making it reachable to other hosts.
Install the NFS Server Package
Server SetupInstall on the intended server. The service name differs across distributions. Avoid running two NFS server implementations at once.
# Debian or Ubuntusudo apt updatesudo apt install nfs-kernel-serversudo systemctl enable --now nfs-kernel-server
# Fedora or RHEL familysudo dnf install nfs-utilssudo systemctl enable --now nfs-server
❯ View Expected Console Output
Active: active (exited) or active (running), depending on distributionCreate a Dedicated Export Directory
Directory AccessUse a new directory for the export and give it an owner/group that matches your access model. Numeric user and group IDs need to be consistent between clients and server unless you use a centralized identity service.
sudo install -d -o root -g root -m 0755 /srv/nfs/team-readonlysudo stat -c '%A %U:%G %n' /srv/nfs/team-readonly❯ View Expected Console Output
drwxr-xr-x root:root /srv/nfs/team-readonlyAllow Only the Intended Client Network
Export PolicyAdd one export rule. The example subnet is reserved for documentation; substitute the exact client CIDR. ro makes the export read-only, sync requests synchronous replies, and root_squash maps remote root to an unprivileged identity (the usual safer default).
echo '/srv/nfs/team-readonly 192.0.2.0/24(ro,sync,root_squash)' \  | sudo tee -a /etc/exports
sudo exportfs -ravsudo exportfs -v
❯ View Expected Console Output
exporting 192.0.2.0/24:/srv/nfs/team-readonly/srv/nfs/team-readonly 192.0.2.0/24(ro,wdelay,root_squash,...)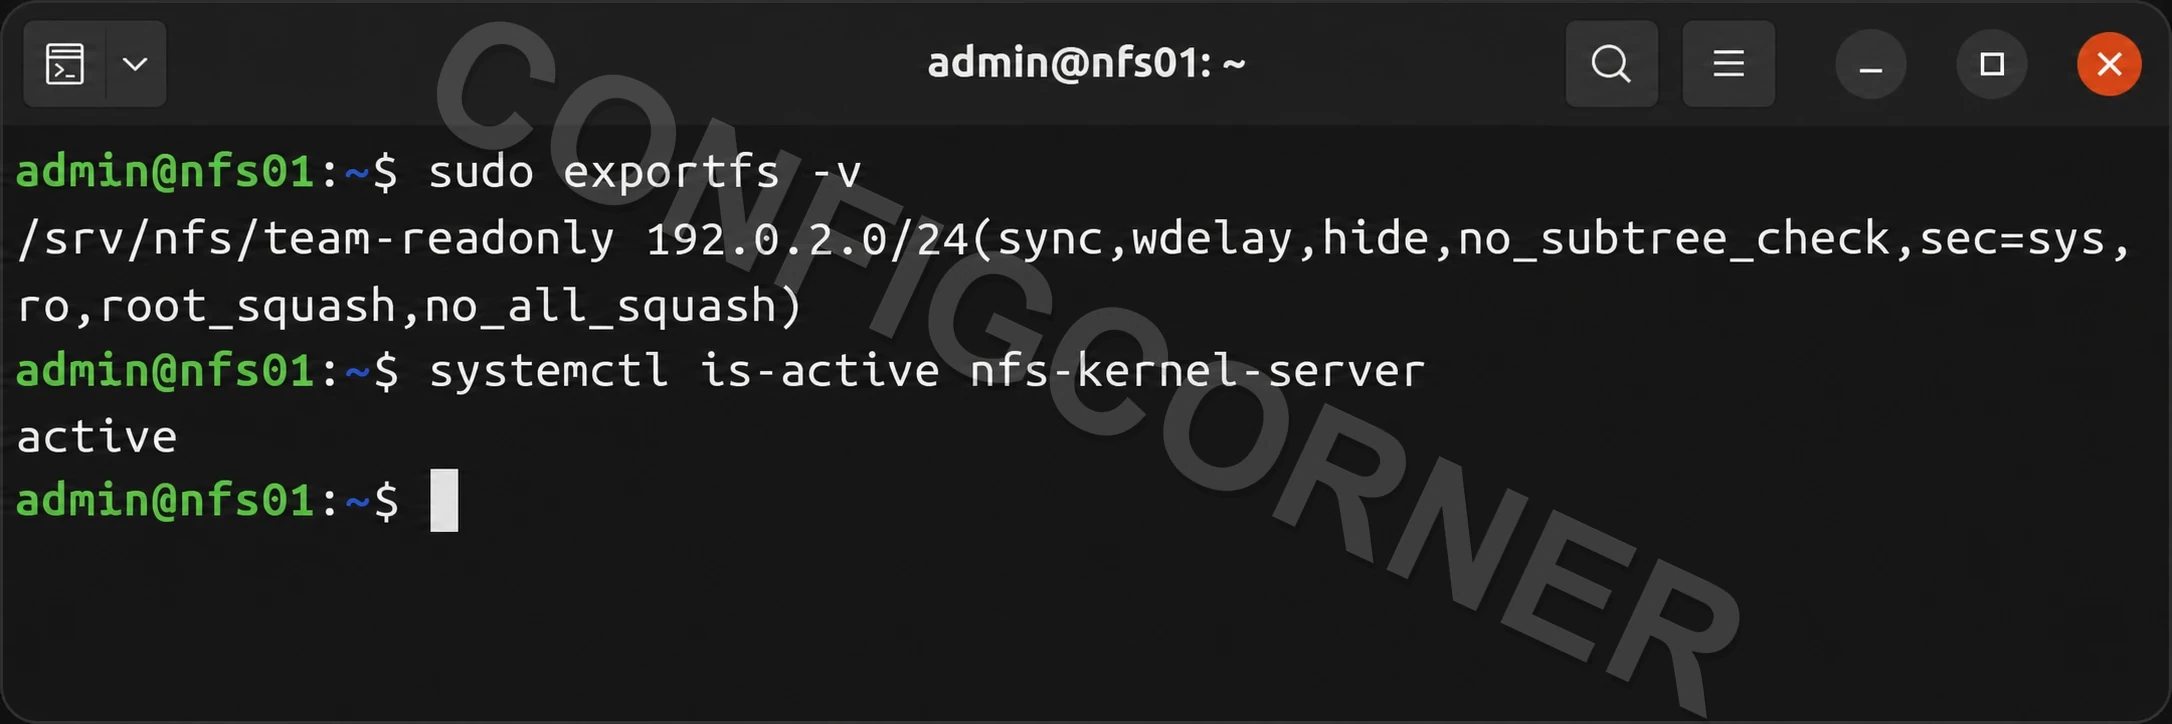
Terminal: Verify the export is restricted to the client subnet and the NFS service is active.
Mount from One Test Client
Client ValidationInstall the NFS client tools on the client, create a temporary mount point, and mount the share for a read test. Use the server’s resolvable name or approved address. This temporary mount disappears at reboot.
# Debian or Ubuntu clientsudo apt install nfs-common
# Fedora or RHEL family clientsudo dnf install nfs-utils
sudo install -d -m 0755 /mnt/team-readonlysudo mount -t nfs nfs01.example.net:/srv/nfs/team-readonly /mnt/team-readonlyfindmnt /mnt/team-readonlytouch /mnt/team-readonly/should-fail.txt
❯ View Expected Console Output
TARGET SOURCE/mnt/team-readonly nfs01.example.net:/srv/nfs/team-readonlytouch: cannot touch ...: Read-only file systemCheck the Export and Close the Test Mount
VerificationOn the server, confirm the effective export and service health. On the client, confirm the mount options and unmount after testing. Add a persistent /etc/fstab entry only after the mount, DNS, routing, and boot-order behavior are understood.
# Serversudo exportfs -ssystemctl --no-pager --full status nfs-server 2>/dev/null || \  systemctl --no-pager --full status nfs-kernel-server
# Clientfindmnt -no SOURCE,FSTYPE,OPTIONS /mnt/team-readonlysudo umount /mnt/team-readonly
❯ View Expected Console Output
Confirm only the intended subnet is listed and the client mount is gone.Further reading: exports(5) and nfs(5).