
Windows Server DNS: Zones, Records, and Safe Scavenging
This guide covers routine DNS Server administration: inspect zones, add a lab host record, verify the answer, and understand stale-record cleanup. Examples use reserved documentation addresses and a placeholder zone; replace them with names and addresses from an approved test environment.
Confirm the DNS Server and Its Zones
Read FirstRun these commands from an elevated PowerShell session on the DNS server, or use -ComputerName with the DNS Server management tools installed. Begin with inventory; do not assume a zone is authoritative or AD-integrated.
Get-WindowsFeature DNSGet-DnsServerZone | Format-Table ZoneName, ZoneType, IsDsIntegrated, IsReverseLookupZoneGet-DnsServerResourceRecord -ZoneName 'lab.example' | Format-Table HostName, RecordType, TimeToLive, Timestamp❯ View Expected Console Output
ZoneName ZoneType IsDsIntegrated IsReverseLookupZone-------- -------- -------------- -------------------lab.example Primary True FalseAdd a Host Record in a Test Zone
DNS RecordsAn A record maps a host name to an IPv4 address. This example creates a static record (no -AgeRecord switch) in an existing test zone. Confirm the name and address are unused before writing to a shared zone.
Add-DnsServerResourceRecordA `  -ZoneName 'lab.example' `  -Name 'app01' `  -IPv4Address '192.0.2.40' `  -TimeToLive 01:00:00
Get-DnsServerResourceRecord -ZoneName 'lab.example' -Name 'app01'Resolve-DnsName app01.lab.example -Server 192.0.2.10
❯ View Expected Console Output
Name Type TTL Section IPAddress---- ---- --- ------- ---------app01 A 3600 Answer 192.0.2.40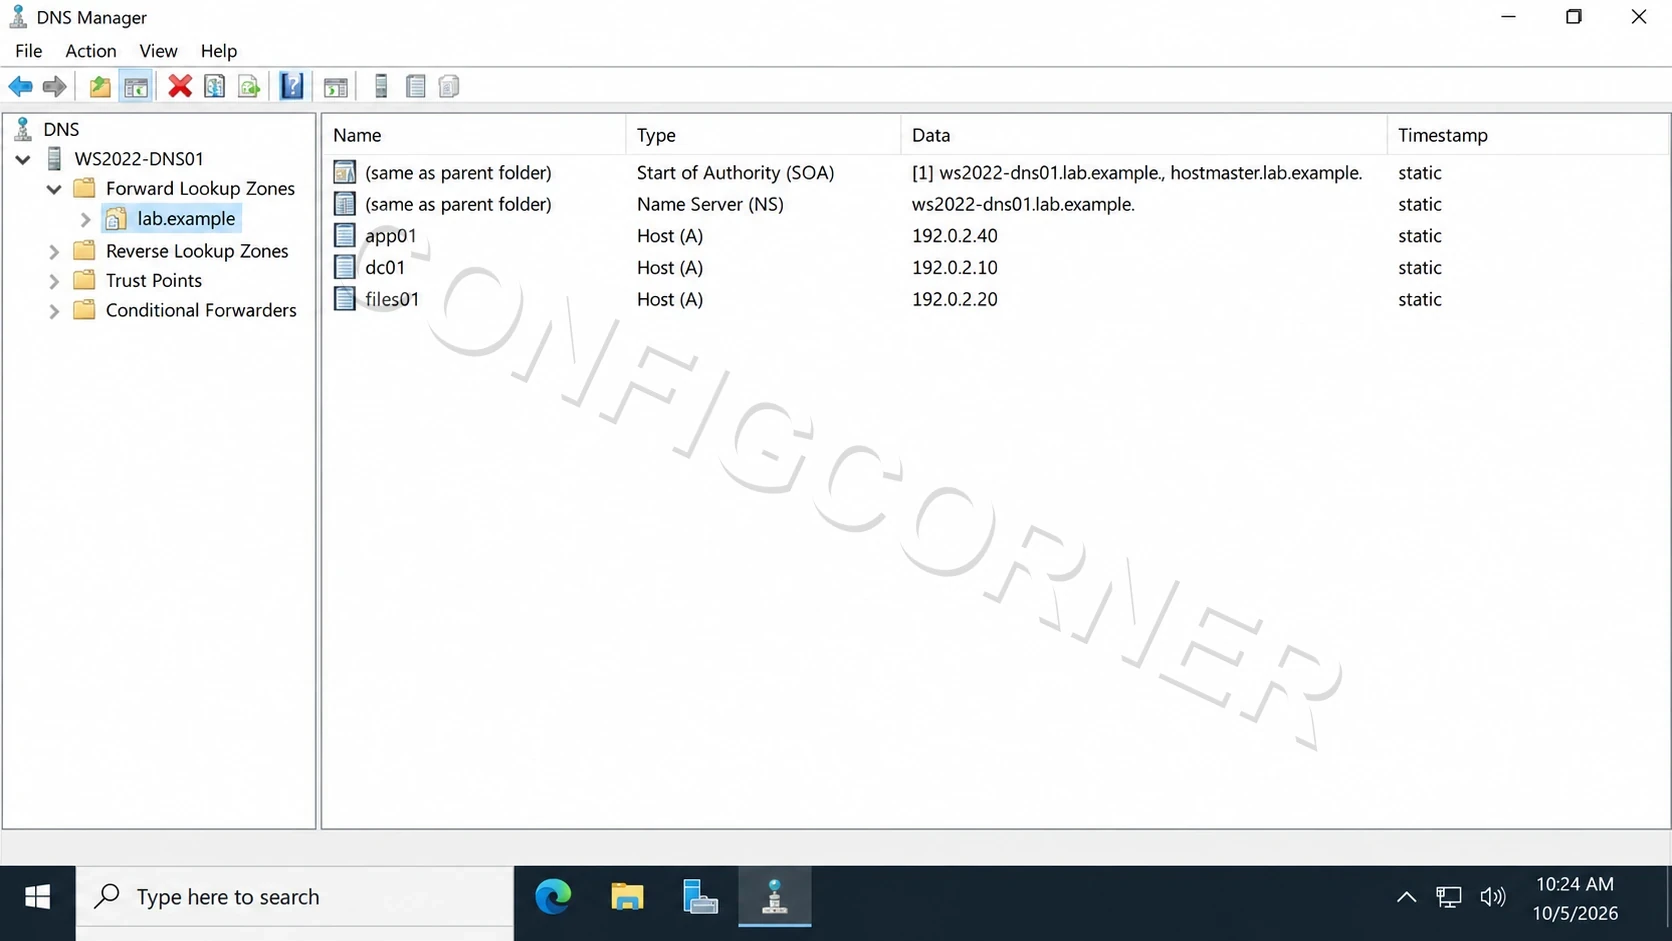
DNS Manager: Review host records and timestamps in the selected forward lookup zone.
Understand Record Ownership and Aging
LifecycleManually added records normally have a zero timestamp and are protected from scavenging. Dynamic records can receive timestamps. Aging controls timestamp refreshes; scavenging is the separate server process that removes eligible records. Both server-level scavenging and zone-level aging must be enabled for cleanup.
Get-DnsServerScavengingGet-DnsServerZoneAging -Name 'lab.example'Get-DnsServerResourceRecord -ZoneName 'lab.example' -Name 'app01' | Select-Object HostName, RecordType, Timestamp❯ View Expected Console Output
ScavengingState : FalseNoRefreshInterval : 7.00:00:00RefreshInterval : 7.00:00:00Plan and Verify Cleanup Before Enabling It
Change ControlUse DNS Manager (dnsmgmt.msc) or PowerShell to configure the zone and server separately. Start by reading settings and identifying records that must remain static. Do not run an immediate scavenging pass as a test on production.
# Example only: enable aging on a lab zone with reviewed intervals.Set-DnsServerZoneAging -Name 'lab.example' -Aging $true `  -NoRefreshInterval 7.00:00:00 -RefreshInterval 7.00:00:00
# Re-read the state; configure server-level scavenging separately# only after reviewing the production change plan.Get-DnsServerZoneAging -Name 'lab.example'Get-DnsServerScavenging
❯ View Expected Console Output
Confirm the zone aging values and server scavenging state match the approved plan.For GUI administration, open DNS Manager, expand the server and zone, then use New Host (A or AAAA) for records. The zone’s Properties → Aging page shows no-refresh and refresh intervals. Keep reverse lookup zones and PTR records consistent with the forward zone where reverse resolution is required.
Further reading: Manage DNS resource records and Configure DNS aging and scavenging.