
Set Up WireGuard Remote Access on pfSense
This guide creates a split-tunnel remote-access VPN on pfSense CE or pfSense Plus. One test client’s peer is identified by 10.6.210.2/32 inside tunnel 10.6.210.0/24 and may reach only an approved internal HTTPS application at 10.20.0.10:443. Replace the public endpoint, subnets, and host with your lab values. WireGuard uses cryptographic peers; it does not provide username and password authentication or per-user MFA by itself.
Plan Addresses, Port, and Access Scope
DesignChoose a tunnel subnet that does not overlap home, office, cloud, or other VPN networks. Choose a reachable WAN name or IP and an approved UDP listen port. Define the exact internal destination and port. Check the application’s own access controls; the firewall rule only limits packet flow. If the firewall is behind another router, the upstream device must forward the chosen UDP port to pfSense.
Firewall endpoint: vpn.example.net:51820Tunnel: 10.6.210.1/24First client: 10.6.210.2/32Permitted service: 10.20.0.10 TCP 443Client routes through tunnel: 10.6.210.0/24, 10.20.0.0/24❯ What to Verify
The tunnel does not overlap an existing network and the access scopeis narrower than full access to the LAN.Install and Enable the WireGuard Package
PrerequisitesConfirm the firewall is on a supported, updated pfSense CE or pfSense Plus release. Under System > Package Manager > Available Packages, install the WireGuard package if absent. Then open VPN > WireGuard and verify the package is available and enabled. Record the installed package version in the change record; menus and optional fields can vary by package release.
System > Package Manager > Available Packages > WireGuard > InstallVPN > WireGuard > Settings: confirm service status❯ What to Verify
WireGuard appears under VPN and the package version is recorded.Create the Firewall Tunnel
TunnelAt VPN > WireGuard > Tunnels, add an enabled tunnel named Remote Access. Set listen port 51820, generate the interface key pair, and set interface address 10.6.210.1/24. Save. Record the firewall public key for client setup, but do not export or display its private key in documentation.
VPN > WireGuard > Tunnels > Add TunnelEnable: checkedDescription: Remote AccessListen Port: 51820Interface Keys: GenerateInterface Addresses: 10.6.210.1/24❯ What to Verify
The tunnel is enabled, has a unique key pair, and owns 10.6.210.1/24.Add One Client Peer
PeerGenerate the client’s key pair in the client application. On pfSense, go to VPN > WireGuard > Peers, select the new tunnel, and add the client’s public key. Leave the endpoint dynamic for roaming clients. Set the peer’s Allowed IPs to the unique client tunnel address 10.6.210.2/32; do not put the whole tunnel subnet there for one peer. Save the peer.
VPN > WireGuard > Peers > Add PeerTunnel: Remote AccessDynamic Endpoint: checkedPublic Key: client's public keyAllowed IPs: 10.6.210.2/32❯ What to Verify
The peer has a unique name, public key, and /32 tunnel address.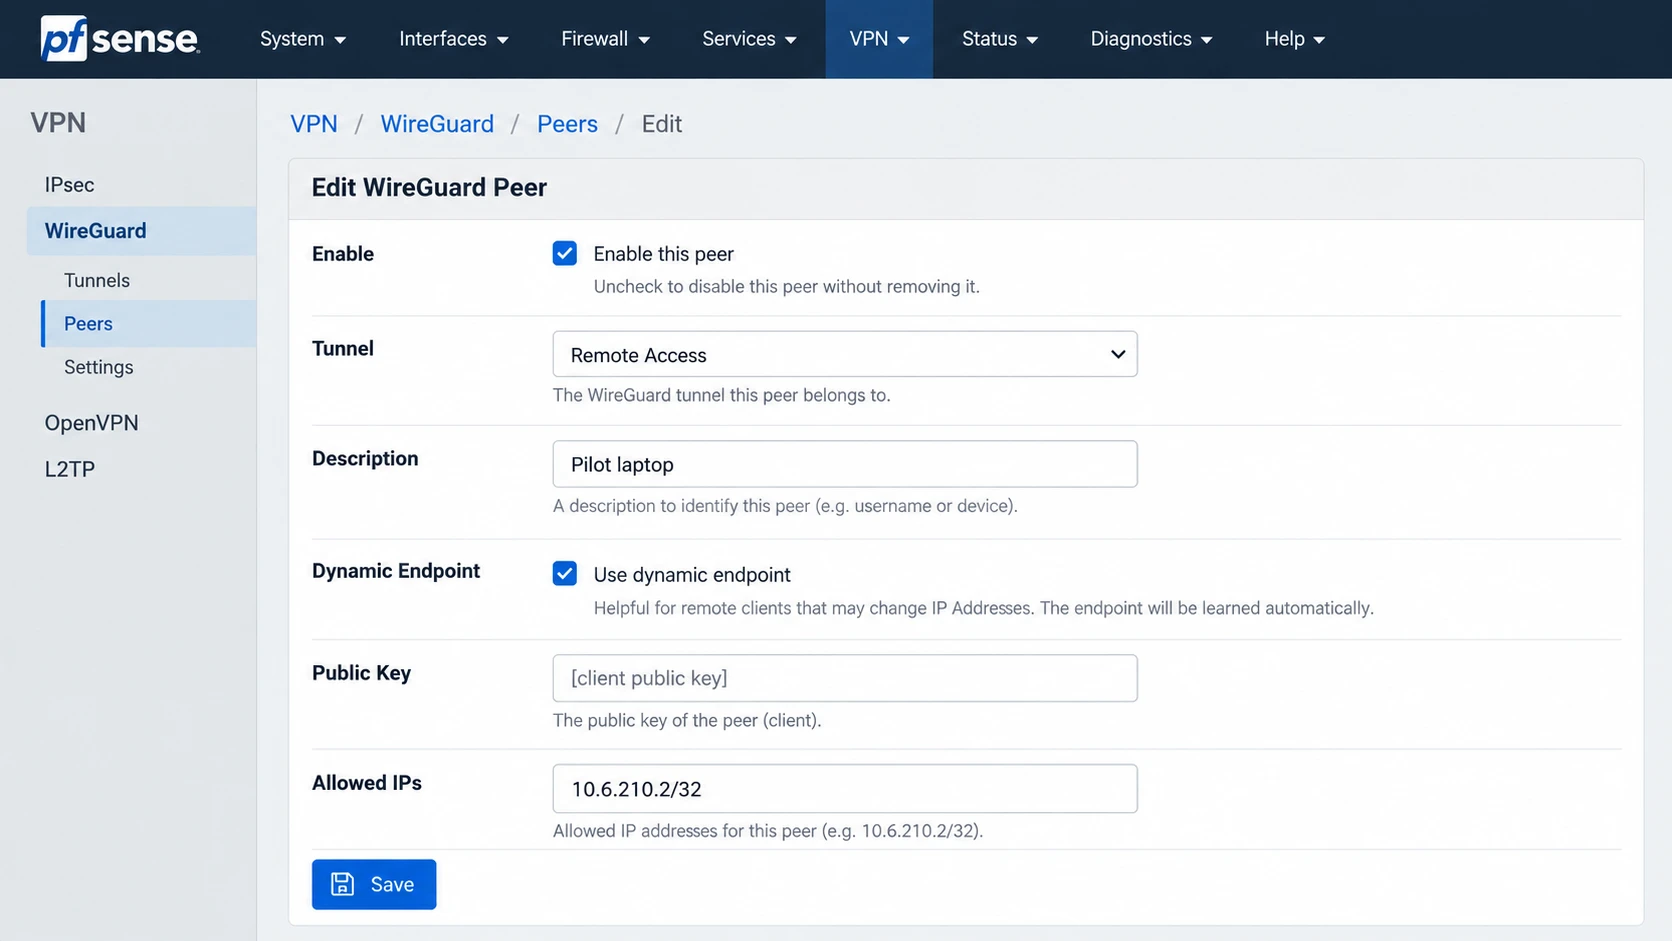
Illustration: The peer belongs to the Remote Access tunnel and uses one unique /32 tunnel address. Supply the client’s public key; keep its private key on the client.
Permit the Handshake and Narrow Tunnel Traffic
FirewallOn the WAN rule tab, permit UDP 51820 to the WAN address so the peer can initiate the tunnel. On the WireGuard rule tab, add a pass rule from 10.6.210.2/32 to 10.20.0.10 on TCP 443. Apply changes. Do not use Netgate’s broad any-to-any recipe rule when only one application is intended. Review existing WireGuard group, assigned-interface, and floating rules for broader matches before relying on this restriction. If you later assign the tunnel as a dedicated interface, recheck rule precedence.
Firewall > Rules > WAN:Pass UDP, source any, destination WAN Address, port 51820
Firewall > Rules > WireGuard:Pass IPv4 TCP, source 10.6.210.2/32,destination 10.20.0.10, destination port 443Save > Apply Changes
❯ What to Verify
The WAN rule admits handshakes; the tunnel rule permits only thedocumented internal HTTPS flow.Configure the Client for Split Tunneling
ClientIn the WireGuard client, use its private key and address 10.6.210.2/24. Set the peer public key to the firewall tunnel’s public key, endpoint to the approved WAN DNS name and UDP port, and AllowedIPs to the tunnel and intended internal subnet. Store the configuration in the client’s secure storage. This example does not send general Internet traffic through the VPN; no Internet outbound NAT is needed for the single internal service.
[Interface]PrivateKey = <CLIENT_PRIVATE_KEY>Address = 10.6.210.2/24
[Peer]PublicKey = <FIREWALL_PUBLIC_KEY>Endpoint = vpn.example.net:51820AllowedIPs = 10.6.210.0/24, 10.20.0.0/24
❯ What to Verify
Only the named tunnel and office subnet routes enter WireGuard.Client and firewall keys are not confused or published.Verify Traffic and Revoke a Lost Peer
ValidationConnect from a network outside the office. Check WireGuard status for a recent handshake and transferred bytes, then test the approved HTTPS application and an unapproved internal destination. A handshake confirms cryptographic contact but does not prove that firewall rules or application access work. Inspect firewall logs if the app fails. For a lost device, disable its peer and remove access immediately; rotate keys if the firewall or peer private key may have been exposed.
Expected: recent handshake and increasing transfer countersExpected: 10.20.0.10:443 reachable through tunnelExpected: other internal services blocked by defaultIf lost: VPN > WireGuard > Peers > disable the affected peer❯ What to Verify
Both an allowed and a denied flow behave as designed from outsidethe office network. The peer inventory has an owner and revocation path.